Spring Garden Revolution: How Self-Watering Ollas Transform Your Growing Season
Share
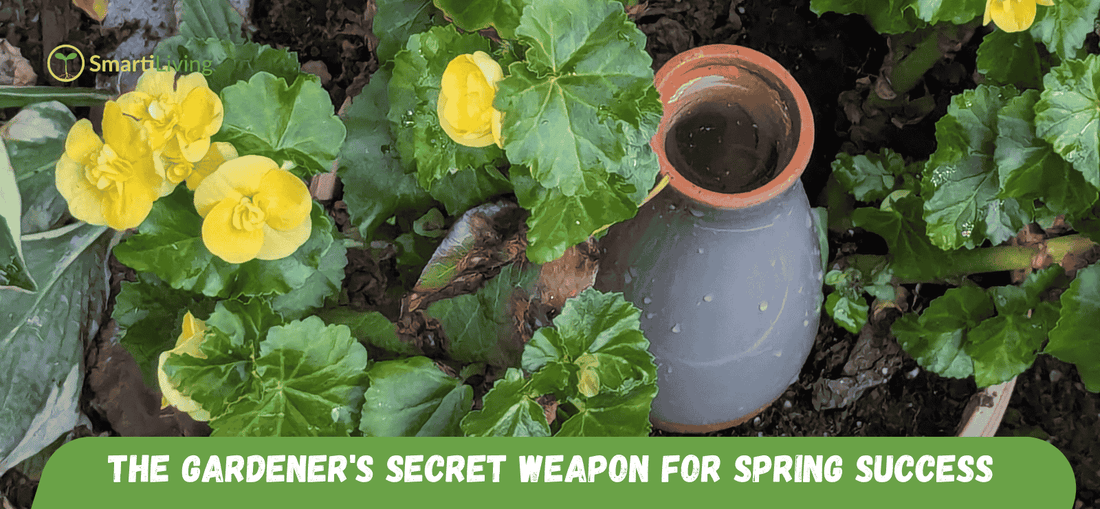
The Gardener's Secret Weapon for Spring Success
As the last frost date approaches, seasoned growers know the secret to an abundant season lies in early preparation. This year, join the revolution of gardeners swapping hoses and sprinklers for self-watering ollas - the ancient irrigation method that's solving modern gardening challenges.
These unglazed terracotta pots work like nature's own drip system, delivering perfect hydration directly to plant roots while you focus on other garden tasks (or simply enjoy the fruits of your labor).
Why Your Garden Craves Olla Irrigation
The Watering Paradox Solved
Most gardeners swing between two extremes:
- Overwatering (root rot, fungal issues)
- Underwatering (stunted growth, poor yields)
Ollas provide the Goldilocks solution:
✅ Just-right moisture 24/7
✅ No more guesswork
✅ Healthier plants with less effort
"My tomato plants doubled in size after switching to ollas - with half the water I used to use!" - Miguel R., Urban Farmer
Your Step-by-Step Spring Olla Setup
1. The Pre-Planting Power Moves
Soil Prep:
- Test drainage (dig 12" hole, fill with water - should drain in 2-4 hours)
- Amend clay soils with 3" compost + 1" coarse sand
- For sandy soils, mix in 2" compost + 1" bentonite clay
Strategic Placement:
- Vegetable beds: Space ollas every 18-24" in grid pattern
- Raised beds: Install along center line
- Container gardens: 1 olla per 14" diameter pot
2. Installation Like a Pro
- Soak ollas overnight for maximum porosity
- Dig holes slightly wider than your ollas
- Set in place leaving neck exposed (mark with colorful tape for visibility)
- Backfill firmly to prevent air pockets
Pro Tip: Plant a few radish seeds near each olla - they'll sprout first and show you the wetting pattern!
Spring Planting Pairings for Olla Success
Early Season Champions
🥬 Leafy Greens:
- Lettuce (harvest 2 weeks earlier with consistent moisture)
- Spinach (reduced bolting)
- Swiss chard (larger, tender leaves)
🌱 Root Vegetables:
- Radishes (perfectly round, never woody)
- Carrots (straight, sweet roots)
- Beets (uniform size, no cracking)
Transition to Warm Season
🍅 Nightshades:
- Tomatoes (prevent blossom end rot)
- Peppers (more flowers = more fruit)
- Eggplant (glossy, unblemished skins)
The Maintenance Myth: Ollas Actually Save Time
Weekly:
- Check water levels (refill when 25% full)
- Add liquid fertilizer to reservoir if desired
Monthly:
- Scrub mineral deposits with vinegar solution
- Inspect for soil compaction around olla
Seasonally:
- Deep clean before winter storage
- Apply terracotta sealer if in freezing climates
Why Gardeners Are Ditching Traditional Watering
| Method | Time/Week | Water Use | Plant Health |
|---|---|---|---|
| Hand Watering | 3-5 hours | High | Inconsistent |
| Sprinklers | 1 hour | Very High | Disease Prone |
| Drip Systems | 30 mins | Medium | Clogs Often |
| Ollas | 15 mins | Low | Optimal |
Troubleshooting Your Olla System
Problem: Water not seeping
Solution: Check for airlocks (fill slowly), clean pores with stiff brush
Problem: Algae growth
Solution: Add 1/4 tsp bleach per gallon (safe for plants)
Problem: Overly wet soil
Solution: Adjust planting distance (further from olla)
The Verdict: Ollas Are Gardening Game-Changers
By investing a few hours in spring to install an olla system, you'll reap these rewards all season:
✔ 70% less time watering
✔ 50% water savings
✔ 30% higher yields
✔ 0% vacation plant casualties
*"After 5 years of olla use, I'll never go back to traditional watering. My garden has never been so productive with so little work." - Linda P., Master Gardener*
Ready to transform your gardening experience? This spring, let SmartiLiving ollas do the watering while you enjoy the harvest!